
TensorFlow can help you build neural network models to automatically recognize images. These are typically Convolutional Neural Networks (CNN). There are two approaches to TensorFlow image recognition:
– Classification—train the CNN to recognize categories like cats, dogs, cars, or anything else. The system classifies the image as a whole, based on these categories. See our in-depth guide on TensorFlow Image Classification.
– Object Detection—more powerful than classification, it can detect multiple objects in the same image. It also tags the objects and shows their location within the image. In this article, we focus on the object detection approach in Tensorflow.
The TensorFlow Object Detection API is an open source framework built on top of TensorFlow that helps build, train and deploy object detection models. The API detects objects using ResNet-50 and ResNet-101 feature extractors trained on the iNaturalist Species Detection Dataset for 4 million iterations. In this page we provide two quick tutorials which can help you learn how to use the Object Detection API.
If you want to go deeper into how the Image Classification models work, their implementation as well as training then Coding exercises with live examples can be accessed at Code Implementation of Image Classification.
Steps for Image recognition on a small dataset using MobileNet
1. Gather a dataset
The dataset in this tutorial should resize images to 300×300 pixels, and sort them into train and test folders.
2. Create bounding boxes
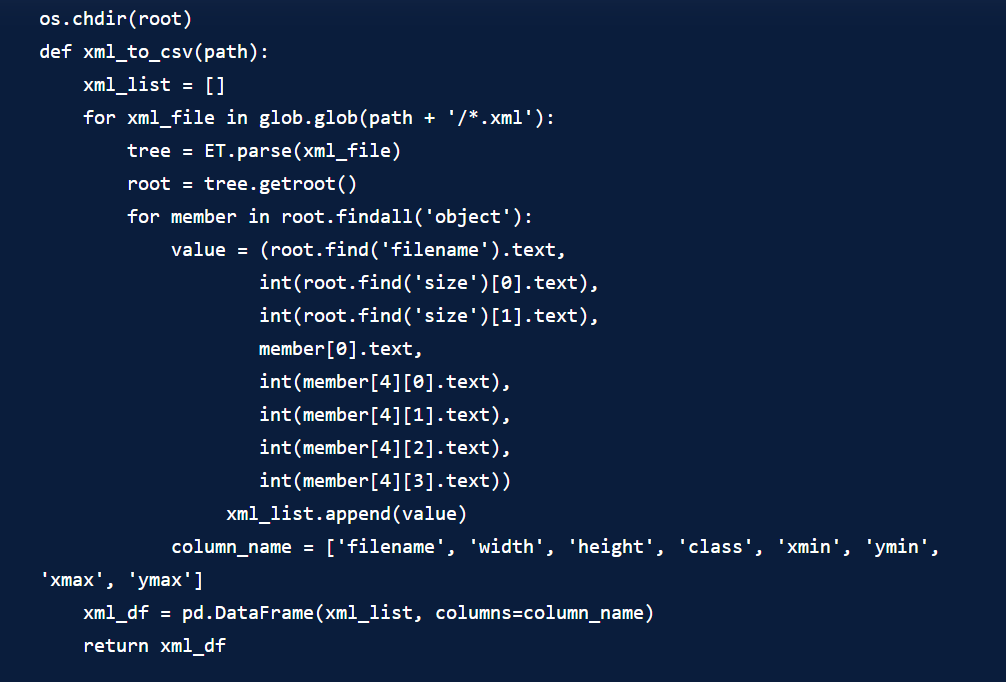
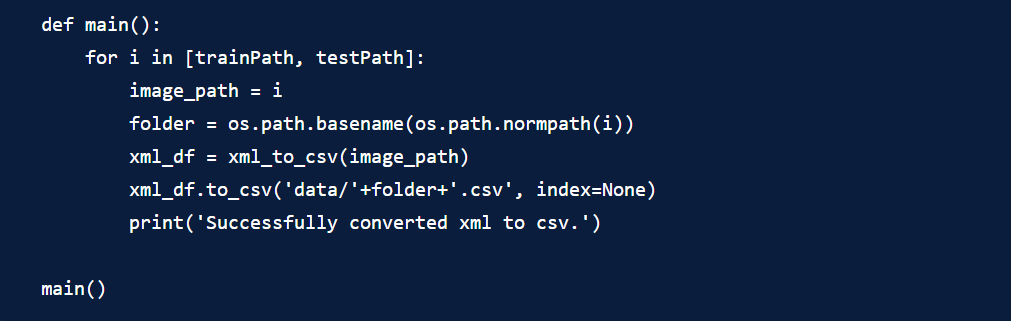
You need the height, width and class of each image to train our object detection model. This includes the associated xmin, xmax, ymin, and ymax bounding boxes.
To help you create these labels, you can use software like LabelImg, an open source program that saves an XML label for each image. You can then convert them into a CSV table for training.
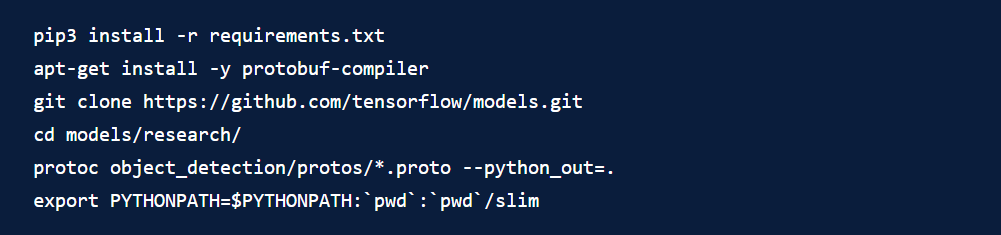
3. Install the Object Detection API
In this step, you need to clone the directory of TensorFlow Models directory and add a modifier to your Python path.
4. Convert labels to the TFRecord format
Use this code to create TFRecord files from your labels
5. Select a model
The TensorFlow Object Detection API has various models: some continuously run the classifier, sliding filters of varying sizes across the image to detect objects, but these consume a lot of resources.
A faster option is the single shot detection (SSD) network, which detects video feeds at high FPS rates and simultaneously determines all the bounding box probabilities. However, SSD sacrifices accuracy for speed, so while it is useful as a bounding box framework, you should use a model like MobileNet for the neural network architecture.
6. Retrain the model
You don’t need a high-end GPU when retraining the last layer of your MobileNet model with your data, though it can speed up the process. To start training, you can run the `train.py` file in the object detection API directory. When loss starts rising or remains constant around the value of 1, you can hit Ctrl+C to stop TensorFlow training.

7. Implement the new model with TensorFlow
Export your graph for inference to start working with your newly trained model.

You can now introduce new images to your model to test its performance. Assign about 10% of your new images as validation images.
Steps for Transfer Learning Using COCO Pre-Trained Model
This article outlines how you can build a model that classifies traffic lights as green, yellow, or red, using a pre-trained model based on the Common Objects in Context (COCO) dataset, using Faster-RCNN-Inception-V2.
Existing pre-trained models can identify traffic lights, but not the color. The tutorial also shows you how to extend the model to work on your own custom dataset. Below are the steps for tutorial:
1. Install model code
We are assuming you will run this model on a Jupyter Notebook. Ensure you have TensorFlow installed, and clone the Git repository by running:

Follow the instructions under “Add Libraries to PYTHONPATH” regardless of whether you have already installed TensorFlow. instructions. Find the models/research/ folder in the terminal console so you can enter the command to modify .bashrc files.
2. Choose a model
The simplest TensorFlow pre-trained model is the default model. Other models provide descriptions of their strengths and weaknesses, and the differences between them can be subtle.
Try out the models on some sample images to get a feel for them. If you can’t find the object you want to detect among the 90 COCO classes, you can test the model on a similar class. For example, substitute a cat for a squirrel.
To test the model, go to the g3doc folder and search the detection_model_zoo.mb file for the model file location, then enter the location into MODEL_NAME in your Jupyter notebook.
3. Define Labels
All labels should be in the TFRecord format. If the labels in your dataset are stored in .xml files, you can use the script create_pascal_tf_record.py to convert them into TFRecord files.
The Bosch dataset stores labels in a .yaml file, as follows:
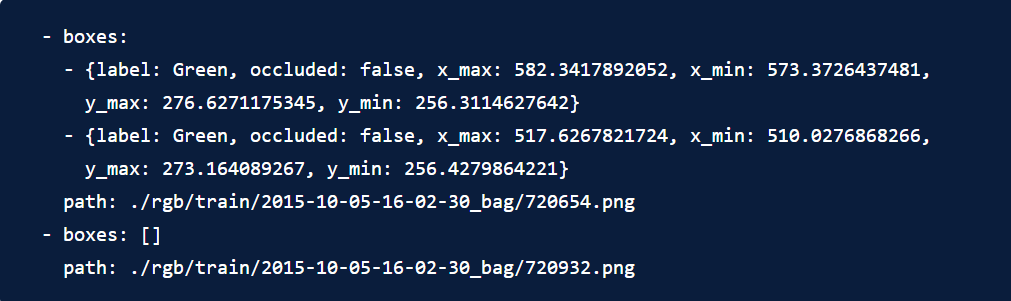
There are two green lights in image 720654.png, and none in 720932.png. A single TFRecord file contains the whole dataset, including all the images and labels.
4. Create a TFRecord file
Have a look at TensorFlow’s sample script in the file using_your_own_dataset.md. The label and data from a single image, taken from a .yaml file, are used to create a TFRecord entry.
You can use the tensorflow.gifle.GFile() function to supply the encoded image data, which you need in addition to the class bounding box information. Use this information to populate all variables in the TFRecord entry.
After completing the create_tf_record() function, create a loop to call that function for every label in your dataset. Your training and evaluation datasets will likely be separate, so you have to make separate TFRecord files for them.
5. Create bounding boxes
You can annotate images easily with LabelImg. Define bounding boxes for traffic lights in the images and save the results to a CSV for training.
6. Model configuration file
COCO pre-trained models work with 90 classes. To modify a COCO model to work on your new dataset, with a different number of classes, you need to replace the last 90 classification layer of the network with a new layer.
For example, assume fc_2nd_last is the second-to-last fully connected layer in your network and nb_classes is the number of classes in your new dataset. Use this to replace the relevant layers:

To do this with the object detection API, you only need to modify one line in the models config file. Navigate to object_detection/samples/configs where you cloned the TensorFlow models repository. This folder contains config files for every pre-trained model.
Place a copy of the config file for the model you selected in a new folder, where you will run the training. Create a folder for your TFRecord file within the new folder and label it “data”, and a second folder called “models” for the .ckpt files—three of them—of your pre-trained model.
model_detection_zoo.md provides download links for each pre-trained model, and each download contains both a .pb file and a .ckpt file. Create a third folder called “train” under the “models” folder.
7. Modify the configuration file to match your custom dataset
Open the config file in a text editor and change the number of classes, located at the top, to match your dataset. Then point the fine_tune_checkpoint path to the model.ckpt file. This should look like:

The num_steps parameter determines the number of training steps you will run. When you’ve started training you should track how long it takes to complete each training step so you can adjust num_steps.
You then need to adjust the input_path and label_map_path for the training and evaluation datasets. The input_path goes to the TFRecord file. You need to create a .pbtxt file so you can point the label_map_path to it. We need to create the file it’s supposed to point to. This file should contain the name and ID for each label in your dataset.
You can do this in any text file using the following format:
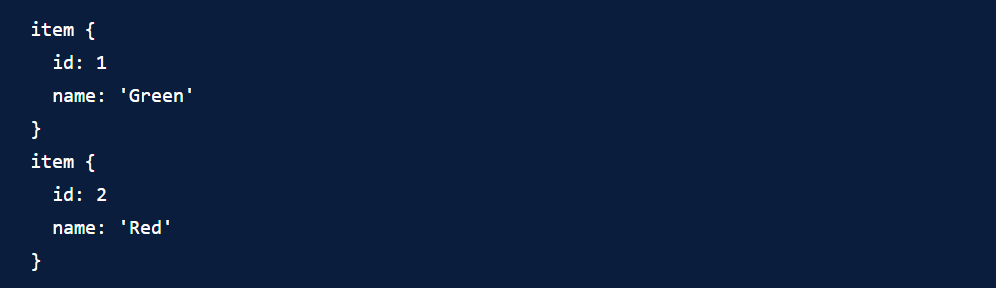
Start with id: 1, not 0, and match num_examples to the number of evaluation samples in your dataset.
8. Run training
Copy train.py from the object_detection folder to your “training” folder. Navigate to this folder and execute the following command line to start training:

9. Save a checkpoint model as a .pb file
Copy the export_inference_graph.py file from the object detection folder to the folder with your model config file.

This creates a new directory fine_tuned_model containing your model, called frozen_inference_graph.pb.
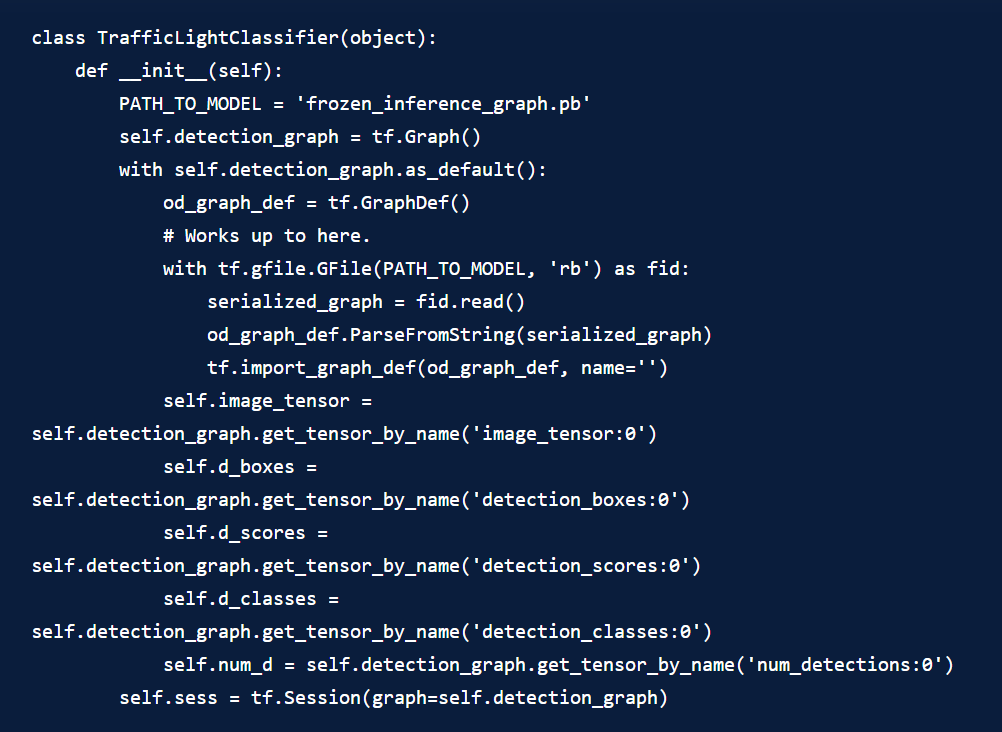
10. Use the model for your project
The project outlined in this tutorial is a traffic light classifier. We implemented the classifier in Python as a class. We created a TensorFlow session in the initialization part of the class, so we don’t need to recreate it whenever we perform classification.
We created a function that processes the image and identifies the bounding boxes, scores, and class of each object classified in the image:
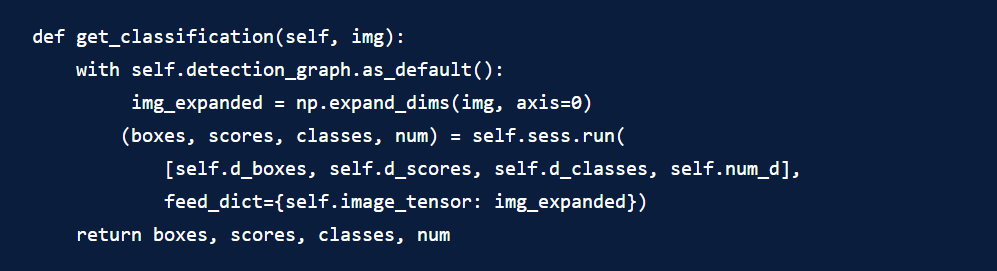
You may now wish to filter the results below the specified score threshold. This is fairly easy to do, as the model automatically sorts the results from highest to lowest score.


